Setting up
Locate {A41CAA1E409C6244}AddonsIntegrations.conf in the FF addon and override it:
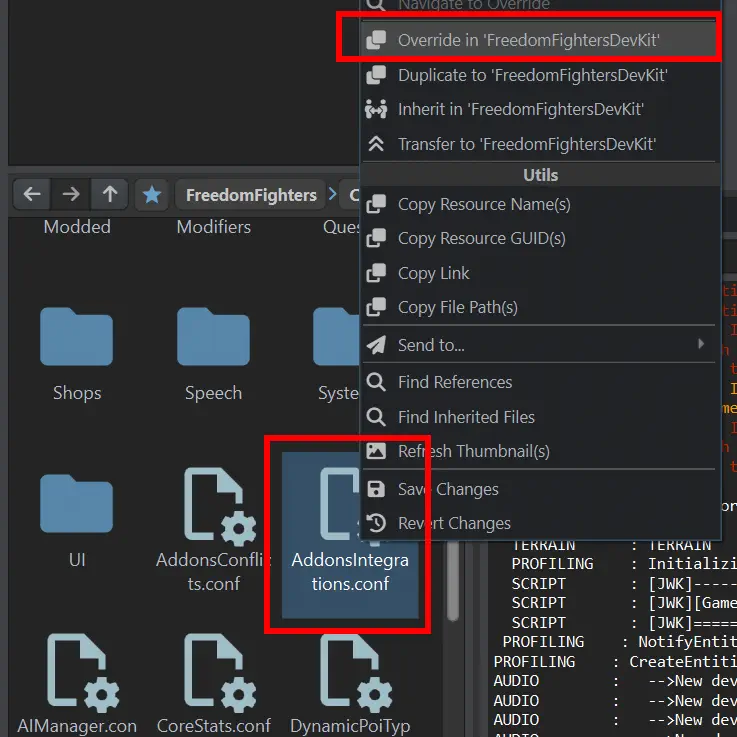
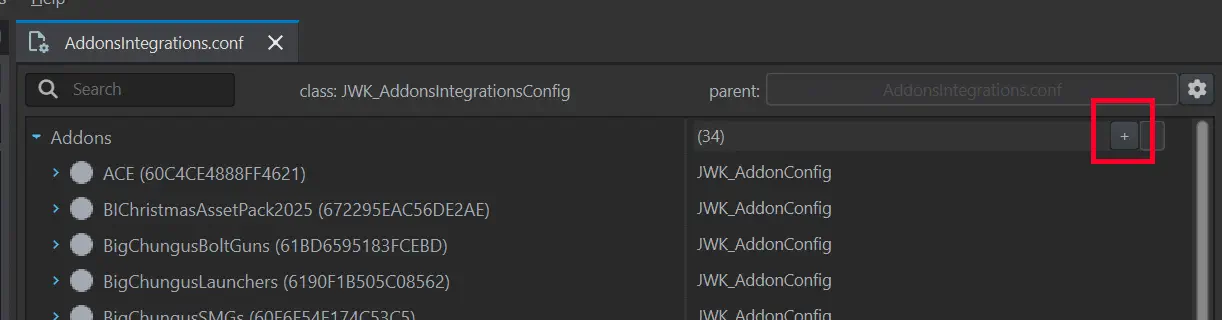
Overriding this config allows you to append new entries into it. Do so by opening it and selecting the + button:
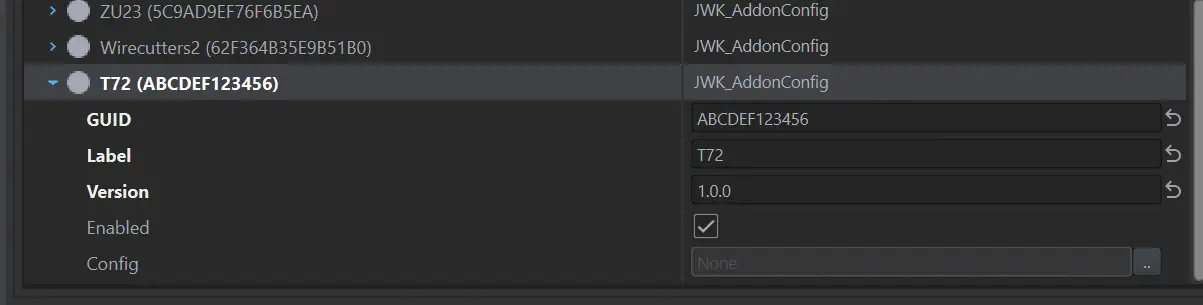
Now fill in the details. Make sure to fill in Mod GUID and Label within your integration config. Label should match the file name of your integration. It will be used within log files and in the editor. The GUID should match the Workshop GUID of the addon you are integrating.
Note
Double-check for mistakes in the GUID! Changes from your integration will not be loaded if an addon with a matching GUID is not present.
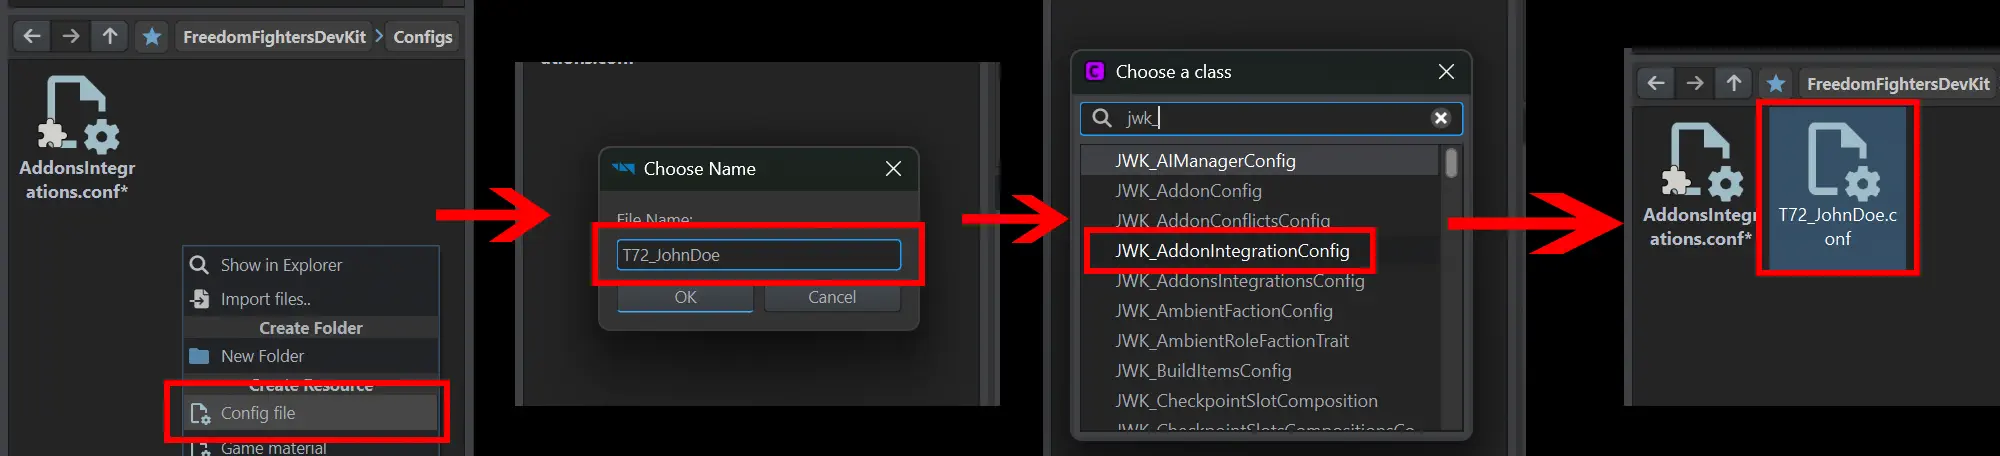
Create a config file of type JWK_AddonIntegrationConfig in your mod. The name of the file should match the mod name. You should include the mod author, if the name is generic (T72_JohnDoe.conf).
Warning
There is a similar config class called JWK_ModIntegrationConfig. That is a legacy type present only for backwards compatibility, make sure not to use it for any newly created content!
Now attach your config file to the registration entry by dragging & dropping it on the Config attribute:

Congratulations, you just created and properly registered your first addon integration!
Verifying the setup
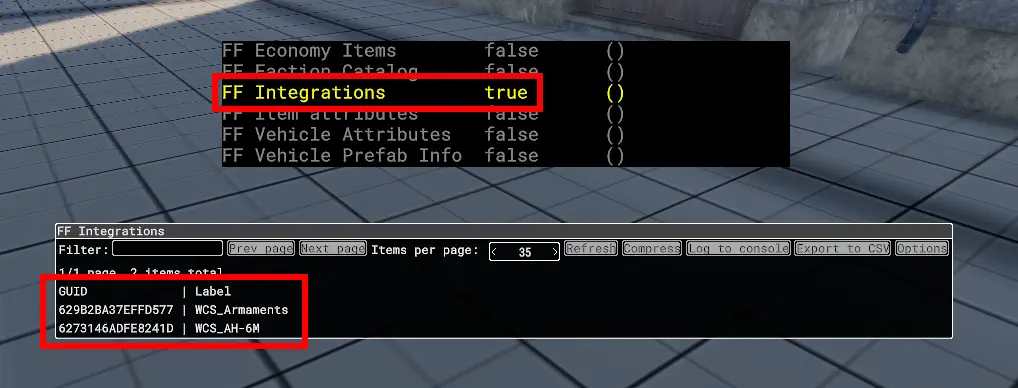
To verify that your config is being loaded, open the FF Integrations data panel and verify that the label of your integration appears on the list:
Additional info
If you want to create an alternate integration for an addon that already has a native integration in FF, you can simply uncheck Enabled attribute on it within your override. It is also possible to load multiple integration configs for the same GUID (however this is not recommended).